
Table of Contents
- Start With a Bug Out Bag Checklist Built Around Your Scenario
- How to Organize a Bug Out Bag: Packing Sequence and Placement
- Building the 72-Hour Emergency Kit Inside Your Pack
- Bug Out Bag Weight: Load Testing, Fit, and Safe Carry Limits
- Adapting Your Pack to Climate, Season, and Local Hazards
- Maintenance: Expiration Checks and Replenishment Schedule
- Common Packing Mistakes That Cost You Time and Energy
- Conclusion
- Frequently Asked Questions
Last Updated: October 12, 2026
Start With a Bug Out Bag Checklist Built Around Your Scenario
Learning how to pack a bug out bag starts with one question: what are you preparing for? A wildfire evacuation, a hurricane warning, or a week without power each demand a different loadout.
A bug out bag is a self-contained emergency kit you can grab when you have minutes to leave. It overlaps with camping packs, but the difference is speed: everything sits in one bag, organized so you can move fast.
The Core Categories Every Pack Needs
Every pack covers seven groups:
- Water: storage plus purification
- Food: non-perishable, no-cook options
- Shelter: emergency shelter and weather protection
Scenario-Based Additions: Duration, Destination, and Household
A 24-hour evacuation to a shelter looks nothing like a 72-hour trip to a rural property. Ask three questions:
- How long will you be gone? One night or three days?
- Where are you going? A shelter with services, or somewhere off-grid?
- Who is coming? Kids, pets, a family member with mobility needs?
A common mistake is packing for the worst-case scenario and ending up with a bag too heavy to carry. Pack for your most likely event first, then add for the extremes.
How to Organize a Bug Out Bag: Packing Sequence and Placement
The best way to organize a bug out bag is by weight and access, not category. Heaviest items sit closest to your spine; items you need in the first five minutes go in outside pockets and on your belt.
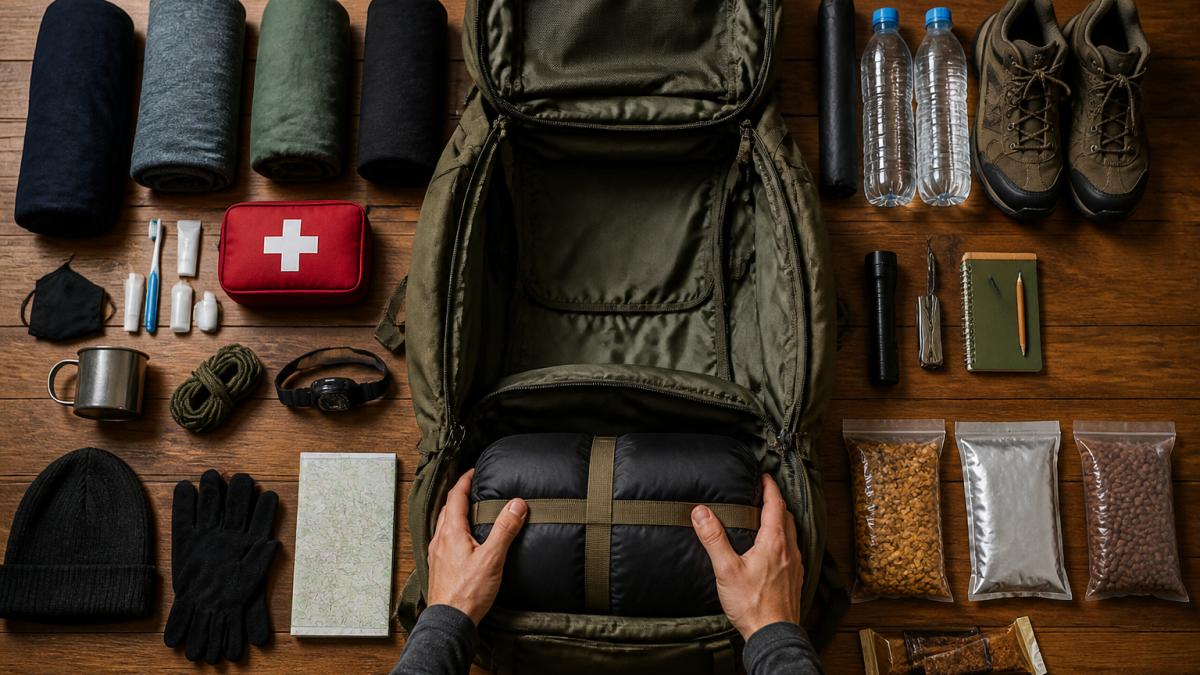
The Three-Zone Layout: Heaviest, Most Used, Least Used
Split your pack into three zones and pack in this order:
- Zone 1 (bottom and against your back): sleeping bag, shelter, water storage, food rations. Heavy and rarely needed mid-move.
- Zone 2 (middle): clothing layers, medical kit, hygiene supplies. Moderate weight, occasional access.
- Zone 3 (top and outside pockets): flashlight, multi-tool, fire starter, navigation, first-aid basics, rain gear. Light and needed fast.
A Repeatable 8-Step Packing Sequence
Under time pressure, a sequence keeps you from burying your headlamp under three days of food. Use this order every time.
- Lay everything out and weigh the categories. Knowing your water is 8 pounds and your food is 4 pounds tells you where the mass is before you commit to a layout.
- Line the bottom with the lightest bulky item. Usually the sleeping bag or a compressed shelter, it fills dead space and cushions your lower back.
- Place water and dense food against your spine, centered. Mass close to your center of gravity keeps the pack from pulling you backward.
- Add clothing layers around the core mass. Roll clothing rather than folding it, rolled layers compress tighter and pull out one at a time.
- Set the medical kit in the middle, zipper facing the pack opening. You should see the red handle without unpacking anything.
- Put quick-access tools in the top lid or an outside pocket. Headlamp, multi-tool, fire starter, and a small first-aid pouch belong here. If you cannot reach it with the pack on, it is in the wrong place.
- Strap the shelter or a bulky layer outside only if it will not fit inside. External loads swing, catch brush, and shift your balance. Treat outside storage as overflow, not default.
- Compress, then shake-test. Cinch every compression strap, lift the pack, and shake it. If contents slide, repack the loose zone, a shifting load will hurt you at mile two.
Placement Diagram: Where Each Category Belongs
Read the diagram top to bottom as access priority: higher and more outward means faster access. Front to back is weight priority: closer to your spine means heavier.
Why This Order Beats Packing by Category
Packing by category, all the food together, all the tools together, feels tidy but puts weight in the wrong places and slows searching. The sequence above delivers three outcomes: the load rides on your hips, first-five-minute items are reachable without removing the pack, and contents do not shift.
Building the 72-Hour Emergency Kit Inside Your Pack
A 72-hour emergency kit is the standard baseline for a bug out bag: three days of supplies for one person. FEMA and the American Red Cross both recommend a three-day supply of food and water per person.
A three-day kit per person:
- Water: one gallon per person per day, plus purification tablets or a filter
- Food: three days of non-perishable, no-cook food
- Shelter: emergency shelter, poncho, or a lightweight tarp
For a ready-made starting point, the Life Pack Ultimate 7 day Survival Pack bundles food rations, water purification tools, first aid items, and survival gear into one system, practical if you would rather buy a complete kit and customize from there.

Bug Out Bag Weight: Load Testing, Fit, and Safe Carry Limits
A bug out bag weight between 20 and 30 pounds is a realistic target for most adults; heavier packs slow you down and cause injury. The old rule of thumb says stay under 20 percent of body weight, but fitness and terrain matter more.
How to Find Your Real Carry Weight
Start with the 20 percent rule, then adjust down based on three factors:
- Fitness: if you do not walk several miles a week, treat 15 percent of body weight as your ceiling, not 20.
- Terrain: flat suburban streets tolerate more weight than hills, sand, or snow.
- Distance: a 30-pound pack is manageable for one mile and punishing for ten. If your evacuation route is long, cut weight before you cut gear, swap a heavy shelter for a tarp, or carry less water and more purification capacity.
A 150-pound adult at 20 percent has a 30-pound ceiling; at 15 percent, 22.5 pounds. That difference is roughly a gallon of water, the percentage rule is a starting point, not a target.
The Fit Sequence: Adjust in This Order
Fit matters as much as weight: proper torso adjustment moves the load onto your hips, not your shoulders. Adjust in this order, because each strap changes how the next behaves:
- Loosen everything first. All straps slack before you start.
- Set the hip belt. Center the padded belt over your hip bones, not your waist. Cinch it snug, this is where 60 to 80 percent of the load should sit.
- Tighten the shoulder straps. They should curve over your shoulders and meet the pack at collarbone height.
- Adjust the load lifters. These small straps at the top of the shoulder straps should pull the pack flat against your back. Over-tightening pulls it off your hips; under-tightening lets it sag.
- Set the sternum strap. It should sit across your chest and be snug enough to stop the shoulder straps from sliding outward, not tight enough to restrict breathing.
- Fine-tune the hip belt after ten minutes of walking. Straps settle. Re-cinch once the pack has warmed to your body.
A pack that rides on your shoulders will hurt within a mile. If your shoulders ache before your hips, the hip belt is too loose or the torso length is wrong.
70L Camping Backpack Hiking Waterproof Travel Bags →
The Load Test Protocol
Do not discover your pack's problems during an evacuation. Test it on a schedule:
- Pack the bag fully, including water. Water is the heaviest single item and changes the balance completely.
- Weigh it on a bathroom scale. Stand on the scale with the pack, then without it, and subtract.
- Walk one mile on varied ground. Include a hill or stairs if you can. Note where you feel pressure.
- Walk a second mile the same day. Fatigue reveals fit problems a short walk hides.
- Adjust straps and remove anything you did not use. If you never opened a pocket, question whether its contents earn their weight.
- Repeat every six months or after any change in fitness, body weight, or pack contents.
Scaling the Load to the Person
One bag per person means one fit per person.
- Adults: use torso length, not height, to size the pack. Measure from the bony bump at the base of your neck to the top of your hip bones.
- Teens and older children: keep the pack under 10 percent of body weight and check the hip belt reaches their hips, not their waist.
- Younger children: a small daypack with water, a snack, and a light layer is enough. Do not load a child with gear they cannot carry comfortably.
The 65 Liter Backpacking Pack weighs just 4 pounds 2 ounces empty and has multi-position torso adjustment that fits many body sizes.

The 70L Camping Backpack Hiking Waterproof Travel Bags offers a larger 65+5L capacity in nylon with a waterproof build, which suits longer evacuations or colder seasons where bulkier layers take up space.
Adapting Your Pack to Climate, Season, and Local Hazards
Your local hazard drives what goes in the bag. A coastal hurricane zone needs different gear than a wildfire corridor or a northern winter region.
Climate and season changes to make:
- Cold weather: add insulation layers, a warmer sleep system, and extra fire-starting supplies
- Hot and dry: increase water capacity and add sun protection
- Wet climates: prioritize rain gear, dry bags, and waterproof pack covers
Household needs matter just as much.
A pocket-sized reference like the Urgent First Aid Guide with CPR and AED gives you 52 pages of step-by-step instructions, including Stop the Bleed information, and meets OSHA and current ANSI first-aid guidelines.

For pets, pack a small separate pouch with food, a leash, and copies of vaccination records.
Maintenance: Expiration Checks and Replenishment Schedule
A pack you never check is a pack you cannot trust. Set a recurring schedule and stick to it.
| Task | Frequency | What to Check |
|---|---|---|
| Water and food rotation | Every 6 months | Expiration dates, seals, water storage |
| Medication swap | Every 3 months | Prescription dates, dosage supply |
| Battery check | Every 6 months | Flashlight, headlamp, spare batteries |
| Full pack review | Once a year | Fit, weight, worn straps, missing items |
| Seasonal swap | Twice a year | Layers, rain gear, climate-specific gear |
Store the bag somewhere you can reach in seconds, a closet by the front door beats a garage shelf behind boxes.
Common Packing Mistakes That Cost You Time and Energy
Most pack failures come down to a handful of fixable errors:
- Overpacking: more gear means more weight and slower movement
- No packing order: gear buried at the bottom costs you minutes when seconds matter
- Ignoring fit: a pack that rides on your shoulders will hurt within a mile
Fix the order, test the weight, and rotate the consumables.
Conclusion
A pack that works is one you have built for your scenario, tested under load, and maintained on a schedule. The gear matters, but the system matters more. North American Tactical Supply builds survival and camping gear with honest materials and clean design, so your kit works when you need it. Start with an all-in-one solution like the Life Pack Ultimate 7 day Survival Pack, or build your own around a durable pack with adjustable fit and waterproof construction.
Frequently Asked Questions
How much should a fully packed bug out bag weigh?
Aim for 20 to 25 percent of your body weight. If you weigh 160 pounds, that means a 32 to 40 pound pack. Water alone adds roughly 8 pounds per gallon, so factor that in before you finish loading. Test your bug out bag weight by walking a mile with the full load. If you cannot maintain a steady pace or your shoulders ache within 15 minutes, remove items or redistribute the load. Lighter packs let you travel longer distances without injury.
What should I pack in a bug out bag for 72 hours?
A 72-hour emergency kit covers water, food, shelter, and safety. Pack one gallon of drinking water per person per day, plus a water purification method. Add non-perishable food at roughly 2,000 calories per day. Include an emergency shelter or tent, a sleeping bag, rain gear, a first-aid kit, a fire starter, a flashlight with spare batteries, a multi-tool, cordage, hygiene supplies, and copies of personal documents. The Life Pack Ultimate 7 Day Survival Pack bundles many of these items in one ready-to-go system.
How do you organize items in a bug out bag?
Use a three-zone layout. Put the heaviest items, like water and food, in the middle of the pack close to your spine for load balance. Place items you need fast, such as a flashlight, first-aid kit, and rain gear, in top pockets and waist-belt compartments. Store least-used gear, like spare clothing and shelter, at the bottom. Keep everything in stuff sacks or compartments so you can find it without unpacking the whole bag in the dark.
How often should I check and update a bug out bag?
Check your pack every six months and after any season change. Replace expired food, rotate water storage, and test batteries and flashlights. Verify that medications are current and that clothing still fits every household member. If you have children or pets, update their supplies as they grow. A simple calendar reminder in spring and fall keeps your emergency preparedness current without a full rebuild each time.