
Table of Contents
- Start With a Home Emergency Kit Checklist
- Water: One Gallon Per Person Per Day
- Food and First Aid for a 72-Hour Emergency Kit
- Building an Emergency Kit for an Apartment
- Lighting, Power, and Communication Backup
- Your Emergency Kit Maintenance Checklist
- Budgeting and Lower-Cost Alternatives
- Conclusion
- Frequently Asked Questions
Last Updated: October 19, 2026
Start With a Home Emergency Kit Checklist
Building home emergency kits starts with one honest question: if the power went out tonight and stayed out for three days, what would your household actually need from its home emergency kits? The answer is smaller and cheaper than most people expect, and it fits in a single storage bin.
At North American Tactical Supply, we sell survival gear for a living, so here is our blunt take: most families do not need a bunker. They need a plan, a checklist, and a bin they can grab without thinking. A home emergency kit is a stored set of supplies that keeps your household fed, hydrated, lit, and reachable for at least 72 hours without outside help. That is the baseline the Ready.gov emergency kit guidance recommends, and it is where every household should start.
Below, we break down exactly what to buy, how much of it, and how to keep it usable instead of letting it rot in a closet.
The Core Supplies Every Kit Needs
The core of any kit breaks into five buckets. Keep them in one place, ideally in a sealed bin near your main exit.
- Water: stored drinking water plus a way to treat more
- Food: non-perishable, no-cook options and a manual can opener
- First aid: a stocked kit, your medications, and a reference guide
- Light and power: flashlights, batteries, a portable charger
- Documents and cash: copies of IDs, insurance, and a small amount of cash
Everything else is a layer on top. Do not overthink the first pass.
Quantities by Household Size
Quantities scale with people, not with square footage. Use this table as your shopping reference:
| Household | Water (3 days) | Food | Flashlights | First-Aid Kits |
|---|---|---|---|---|
| 1 person | 3 gallons | 3 days of no-cook meals | 2 | 1 |
| 2 people | 6 gallons | 3 days of no-cook meals | 2-3 | 1 |
| 4 people | 12 gallons | 3 days of no-cook meals | 3-4 | 1-2 |
| 4 people + 1 pet | 12 gallons + pet water | Add pet food for 3 days | 3-4 | 1-2 |
Add one extra gallon per pet per day for drinking and cleanup.
Water: One Gallon Per Person Per Day
Water is the supply people underestimate most. The standard rule is one gallon per person per day, and that covers drinking, basic cooking, and light hygiene. For a three-day kit, that means three gallons per person. For a two-week shelter-in-place supply, it means 14 gallons per person.
Storing that much water takes space, so most households split the job:
- Bottled water for drinking, rotated every few months
- Water pouches for grab-and-go bags, since they pack flat and store well
- A treatment method for refilling from a questionable source
For treatment, our water purification tablet strips cost $0.99 and treat 10 liters, one tablet per liter with a 30-minute wait. A personal water purification straw at $14.99 lets you drink directly from a stream or tap you would not otherwise trust. For compact storage, our six-pack of water pouches runs $2.50 and slips into any bag.


Food and First Aid for a 72-Hour Emergency Kit
A 72-hour emergency kit needs food you can eat cold and first aid you can use one-handed in the dark. That is the whole design brief.
Non-Perishable Food That Stores Well
Stock food that needs no cooking, no refrigeration, and no cleanup. Good choices:
- Canned beans, tuna, and fruit with a manual can opener
- Peanut butter, crackers, and granola bars
- Instant oatmeal and shelf-stable milk
- Dried fruit and nuts
- Electrolyte packets
Rotate food every six to twelve months by eating what you store and restocking. Label each item with the date you bought it.
Medications and Medical Supplies
Prescription medication is the item most kits miss. Keep a three-day supply of any daily medication in your kit, rotated with your regular refills. Add:
- A stocked first-aid kit with bandages, gauze, and antiseptic
- A seven-day pill organizer
- Spare glasses or contacts
- A printed list of medications and allergies
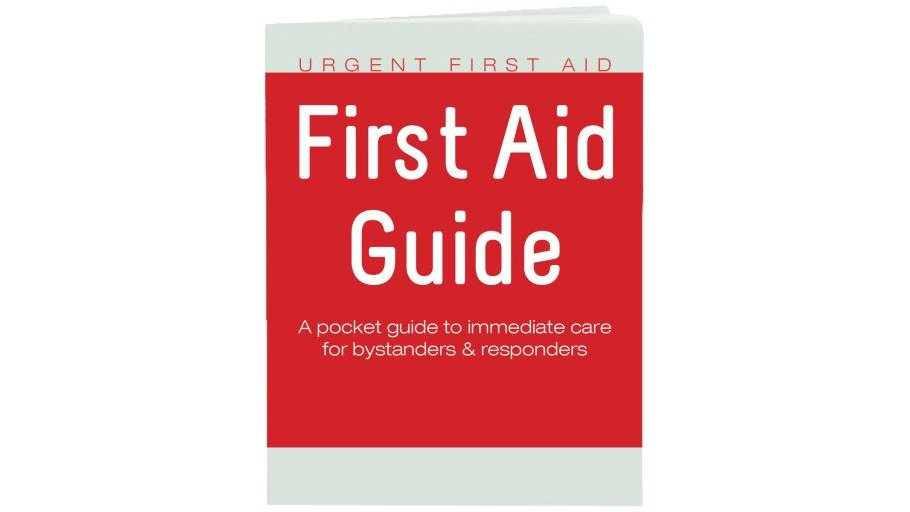
A pocket reference helps when stress hits. Our 52-page first aid guide with CPR and AED instructions costs $1.99 and meets current OSHA and ANSI first aid guidelines. It is the cheapest insurance in the bin.
Building an Emergency Kit for an Apartment
An emergency kit for an apartment looks different from a house kit. Space is tighter, exits are shared, and evacuation may mean stairs. Keep the kit in one rolling bin or a heavy-duty backpack near your door.
Water Purification Tablet Strips →
Apartment-specific additions:
- Sturdy shoes and a flashlight by the bed, since stairwells go dark
- A go-bag you can carry down several flights without stopping
- Copies of your lease and renter's insurance in a waterproof sleeve
- A battery-powered radio for building-wide alerts
- A small fire extinguisher rated for kitchen and electrical fires
If you have mobility needs, pack gear you can use without setup. A purification straw beats a pump filter when hands are shaky.
Lighting, Power, and Communication Backup
Light and communication fail together in most outages. Plan for both.
- Flashlights: one per person plus one for common areas, with spare batteries
- Headlamps: hands-free light for repairs and first aid
- Portable charger: a charged power bank for phones
- Battery or hand-crank radio: for official updates when cell service drops
- Emergency contacts: written on paper, not just saved in your phone
Charge power banks monthly and test flashlights quarterly. A dead flashlight you find in an emergency is worse than no flashlight, because you planned around it.
Your Emergency Kit Maintenance Checklist
An emergency kit maintenance checklist is what separates a real kit from a pile of expired cans. Storage conditions matter as much as the checklist itself: heat, light, and moisture shorten the life of food, water, batteries, and medications, so keep the bin in a cool, dry interior closet rather than a garage, attic, or basement that floods.
Where to store it:
- A sealed plastic bin with a latching lid in a climate-controlled closet near your main exit
- A smaller grab-and-go bag near the door for evacuation
- A second small stash in the car if you commute
Rotation and expiration management:
- Water: commercially bottled water typically carries a printed date; rotate every six to twelve months. Water pouches often have a five-year shelf life, so check the printed date and rotate on that schedule. Store tap water in food-grade containers and replace every six months.
- Food: rotate every six to twelve months by eating what you store and restocking. Label each item with the purchase date. Canned goods generally hold quality for two to five years, but rotate on the shorter end so you are not relying on a decade-old can.
- Batteries: test flashlights quarterly and replace alkaline batteries every one to two years even if they still work. Remove batteries from devices you do not use often to prevent corrosion.
- Medications: keep a three-day supply rotated with your regular refills. Check expiration dates twice a year and replace anything expiring within six months.
- Power banks: charge monthly. Lithium-ion cells lose capacity if left fully drained.
Twice-yearly checklist (set two calendar reminders):
- Check water dates and replace expired bottles or pouches
- Rotate food by eating and restocking older items
- Test flashlights and swap any weak batteries
- Charge power banks and test the radio
- Check medication expiration dates
- Confirm documents and cash are current
- Restock first-aid supplies used during the year
- Update the kit for household changes (new baby, new pet, new medical need)
- Verify the bin is still dry and the lid seals
Budgeting and Lower-Cost Alternatives
You can build a solid starter kit without spending much. Buy in this order:
- Water and a treatment method first. Cheapest and most critical.
- Food you already eat. Buy extra of what is on your shelf.
- Light and power. Flashlights and one power bank.
- First aid and your medications. Non-negotiable.
- Documents and cash. Costs almost nothing.
Lower-cost moves that work:
- Store tap water in food-grade containers instead of buying bottled
- Use a purification straw or tablets instead of a full filter system
- Build the kit over several grocery trips instead of one purchase
- Skip gear you will not use; a $40 gadget you never open is wasted money
Conclusion
The hard part of preparedness is not buying gear. It is starting, and then keeping the kit current as your household changes. Most families put it off for years, then wish they had started sooner.
North American Tactical Supply builds all-in-one solutions with honest materials and clean design, made to work better and last longer. Our water treatment, first aid, and storage essentials are priced to fit a real budget, starting under a dollar. Build the checklist, stock the bin, and set the reminder. Then shop our emergency essentials and get your kit ready this week.
Frequently Asked Questions
How much water should I store in a home emergency kit?
Plan on one gallon per person per day for drinking and basic hygiene, and store at least a three-day supply, so 3 gallons per person. A two-week supply is better if you have room. Don't forget pets, which need their own water. Rotate stored water every six months, and add a backup treatment method like purification tablets or a filter straw so you can make questionable water safe if your supply runs low.
How many days of supplies should a home emergency kit cover?
Start with a 72-hour emergency kit, since most local evacuations and storm outages resolve within three days. Then build toward a two-week supply for sheltering in place, because widespread disasters can delay resupply. The two-week target covers water, non-perishable food, medications, and hygiene items. Keep the 72-hour kit in a grab-and-go bag and the longer supply stored at home.
How often should I check and replace emergency kit supplies?
Do a full inventory twice a year, ideally when clocks change in spring and fall. Check expiration dates on food, water, and medications, test flashlights and radios, and recharge power banks. Replace anything expired or damaged. A written emergency kit maintenance checklist taped to the storage bin makes this a 20-minute job instead of a guessing game.
What should I pack in an emergency kit for an apartment?
Apartment kits need the same core supplies but must fit tight storage. Use stackable bins and under-bed containers. Include a flashlight, batteries, water pouches, non-perishable food, a first-aid kit, copies of important documents, and a portable charger. Add a stair-friendly grab bag in case the elevator is out, and keep a pair of sturdy shoes near the door for evacuation.